Flask 初识
Flask是一个基于Python的web开发框架,以“微”框架著称,本身不具备太多的功能,但是通过丰富的第三方插件,可以轻松应对现实开发中复杂的需求,并且有大量的企业在使用Flask构建自己的产品。国内比较出名的有比如豆瓣、果壳网,国外的有Reddit、Netflix等。
第一个Flask
会有三个文件(夹)分别存放静态文件,jinja2模板和app.py(入口程序)
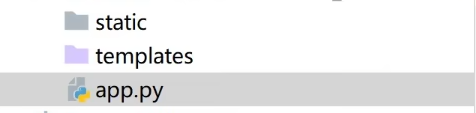
app.py
1
2
3
4
5
6
7
8
9
10
11
12
13
| from flask import Flask
app = Flask(__name__)
@app.route('/')
def hello_world():
return 'Hello World!'
if __name__ == '__main__':
app.run()
|
Flask配置
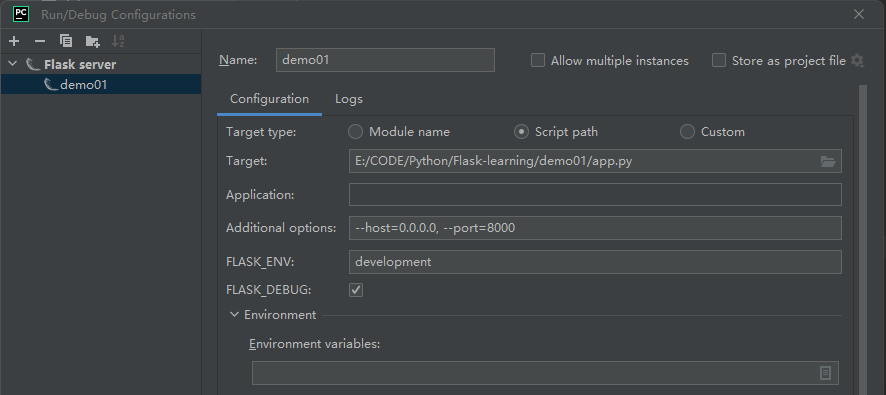
debug
默认不开启debug模式(每次改变代码后需要重新启动代码才能在浏览器刷新有效)

开启debug
在右上角Edit Configuration,开启FlASK_DEBUIG
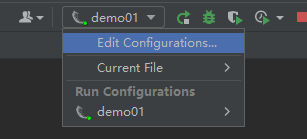
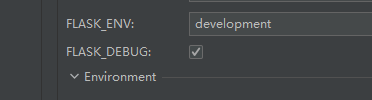
成功后:

1
2
| if __name__ == '__main__':
app.run(debug=True)
|
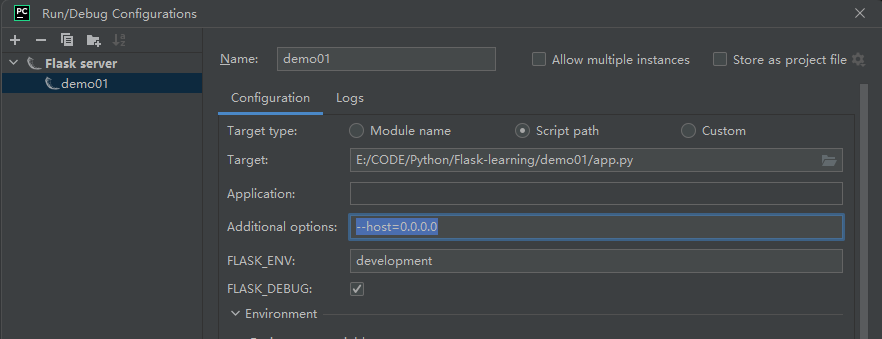
host
监听的主机名,默认是 127.0.0.1
如果在局域网里面,想让别人也访问项目,可以将host设置为 0.0.0.0,这样就可以通过别人访问自己的ip地址(比如192.168.xx.xx)访问到项目,也可以直接设置成自己的ip地址(0.0.0.0更方便)
一文彻底明白127.0.0.1和0.0.0.0地址的区别是什么? - 知乎 (zhihu.com)

port
修改port两种方式:
方式一:修改配置文件
方式二:代码里配置
1
2
| if __name__ == '__main__':
app.run(debug=True, port=8000)
|
threaded
如果电脑打开浏览器比较慢,可以设置
1
2
| if __name__ == '__main__':
app.run(debug=True, threaded=True)
|
项目拆分
URL与视图
URL组成:协议 (http[80] / https[443]) / 域名(www.baidu.com) : 443 / path

路由参数
前两种就是正常的路由
最后一种是带参数,用 <> 括起来
1
2
3
| @app.route("/paramPath/<paramId>")
def paramPath(paramId):
return "id: %s" % paramId
|
甚至可以指定参数路由的类型
1
2
3
| @app.route("/paramPath/<int: paramId>")
def paramPath(paramId):
return "id: %d" % paramId
|
注意,定义的参数可以不传,比如上方的例子,单独设置一个 “/paramPath” 路由当默认路由即可
request
通过 request 获取参数(以get请求为例子)
如果访问 /list?page=1
1
2
3
4
5
| from flask import Flask, request
@app.route("/list")
def list():
page = request.args.get("page", default=1, type=int)
return "你获取的是第%d页" % page
|
模板渲染
Jinja2模板渲染
flask包中的render_template,就会自动查找template文件夹下的html文件,进行渲染
1
2
3
4
| from flask import Flask, render_template
@app.route("/")
def index():
return render_template("index.html")
|
给模板Html传递参数
1
2
3
4
| from flask import Flask, render_template
@app.route("/index/<param>")
def index(param):
return render_template("index.html", param1 = param)
|
然后在HTML中使用Flask的模板语法:用{{}}括起来
1
2
3
| <h1>
你的参数是 {{param1}}
</h1>
|
过滤器filter
过滤器本质上是Python的函数,他会把被过滤的值当做第一个参数传给这个函数,函
数经过一些逻辑处理后,再返回新的值。在过滤器函数写好后,可以通过@app.template_filter
装饰器或者是app.add template_filter函数来把函数注册成Jinja2能用的过滤器。这里我们以
注册一个时间格式化的过滤器为例,来面说明下自定义过滤器的方法。·
1
2
3
| def datetime_format(value, format="%Y-%d-%m %H:%M"):
return value.strftime (format)
app.add_template_filter(datetime_format,"dformat")
|
模板中使用:
1
2
3
| <div>
{{ mytime | dformat}}
</div>
|
模板控制语句
if语句
1
2
3
4
5
6
7
8
9
| <body>
{% if age>18 %}
<div>您已经满18岁</div>
{% elif age==18%}
<div>您刚满18岁 </div>
{% else %}
<div>您未满18岁 </div>
{% endif %}
</body>
|
for循环语句
注意:Jinja2中的for循环没有break语句,只能一次遍历完所有
1
2
3
4
5
6
7
8
9
10
11
12
13
| @app.route("/books")
def books():
books = [
{
"name" = "三国演义",
"author" = "罗贯中"
},
{
"name" = "水浒传",
"author" = "施耐庵"
}
]
return render_template("books.html", books=books)
|
1
2
3
4
5
| <body>
{% for book in books %}
{{book.name}}
{% endfor %}
</body>
|
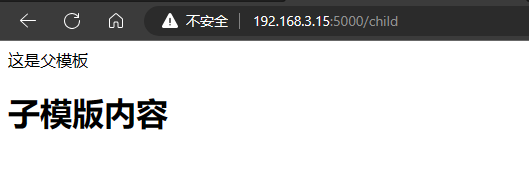
模板继承
父模板的HTML文件写好后,如何继承父模板:
在需要继承的地方:
1
| {% extends "base.html" %}
|
可以通过block语法,在子文件中添加新东西并渲染回父模板
举例:
父模板:
1
2
3
4
5
6
7
8
9
10
11
| <!DOCTYPE html>
<html lang="en">
<head>
<meta charset="UTF-8">
<title>{% block title %}{% endblock %}</title>
</head>
<body>
这是父模板
{% block content %}{% endblock %}
</body>
</html>
|
继承并使用:
1
2
3
4
5
6
7
8
9
| {% extends "base.html" %}
{% block title %}
childTitle
{% endblock %}
{% block content %}
<h1>子模版内容</h1>
{% endblock %}
|
1
2
3
| @app.route('/child')
def child():
return render_template("child.html")
|
效果:
url_for
语法:
1
2
3
| url_for('蓝图名称.视图函数名称')
url_for('视图函数名称')
|
使用 url for 语法
在HTML中加载静态文件时(静态文件放在static目录下):
1
| <img src="{{ url_for('static', filename='img.jpg') }}">
|
如果图片在子文件夹中
1
| <img src="{{ url_for('static', filename='/childfold/img.jpg') }}">
|
Flask提交数据表单到模板
使用:
1
2
3
| from flask import Flask, render_template, request
from werkzeug.wrappers.response import ResponseStream
|
定义路由
1
2
3
4
5
6
7
8
9
| @app.route('/form/student')
def student():
return render_template('form/student.html')
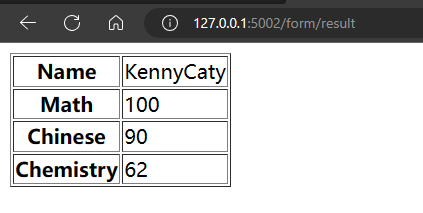
@app.route('/form/result', methods=['POST', 'GET'])
def result():
if request.method=='POST':
rst = request.form
return render_template('form/result.html', result=rst)
|
student:
1
2
3
4
5
6
7
| <form action="/form/result" method="POST">
<p>name <input type="text" name="Name"></p>
<p>math <input type="text" name="Math"></p>
<p>Chinese <input type="text" name="Chinese"></p>
<p>chemistry <input type="text" name="Chemistry"></p>
<p><input type="submit" value="submit" name="" id=""></p>
</form>
|
result:
1
2
3
4
5
6
7
8
| <table border="1">
{% for key, value in result.items() %}
<tr>
<th>{{ key }}</th>
<td>{{ value }}</td>
</tr>
{% endfor %}
</table>
|
表单

结果
flask重定向和错误
下面的例子:
使用
1
| from flask import Flask, render_template, request, url_for, redirect, abort
|
路由:
1
2
3
4
5
6
7
8
9
10
11
12
13
14
15
16
17
| @app.route('/')
def index():
return render_template('index.html')
@app.route('/login', methods=['POST', 'GET'])
def login():
if request.method == 'POST':
if request.form['username'] == 'admin' :
return redirect(url_for('success'))
else:
abort(401)
elif request.method == 'GET':
return redirect('/')
@app.route('/login/success')
def success():
return "login success!"
|
index:
1
2
3
4
| <form action="/login" method="POST">
<p><input type="text" name="username" id=""></p>
<p><input type="submit" value="登录"></p>
</form>
|
Request和Response
Request
request对象的属性:
| 属性 |
功能 |
| url |
完整请求地址 |
| base_url |
去掉GET参数的URL |
| host_url |
只有主机和端口号的URL |
| path |
路由中的路径 |
| method |
请求方法 |
| remote_addr |
请求的客户端地址 |
| args |
GET请求参数 |
| form |
POST请求参数 |
| files |
文件上传 |
| headers |
请求头 |
| cookies |
请求中的cookie |
Response
响应的几种方式:
- 返回字符串
1
2
3
| @app.route('/')
def index():
return "hello"
|
- 模板渲染
这个就需要有html
1
2
3
| @app.route('/')
def index():
return render_template('index.html' [,arg1=xx])
|
- 返回 Json 数据(前后端分离)
直接返回字典
1
2
3
4
| @app.route('/')
def index():
data = {'name':'张三', 'age': 18}
return data
|
1
2
3
4
| {
"age": 18,
"name": "张三"
}
|
做一个序列化,将字典转成字符串
1
2
3
4
| @app.route('/')
def index():
data = {'name':'张三', 'age': 18}
return jsonify(data)
|
自定义Response对象
1
2
3
| html = render_template('index.html')
res = make_response(html)
|
cookie和session
使用:
1
| from flask import Flask, make_response, request, session
|
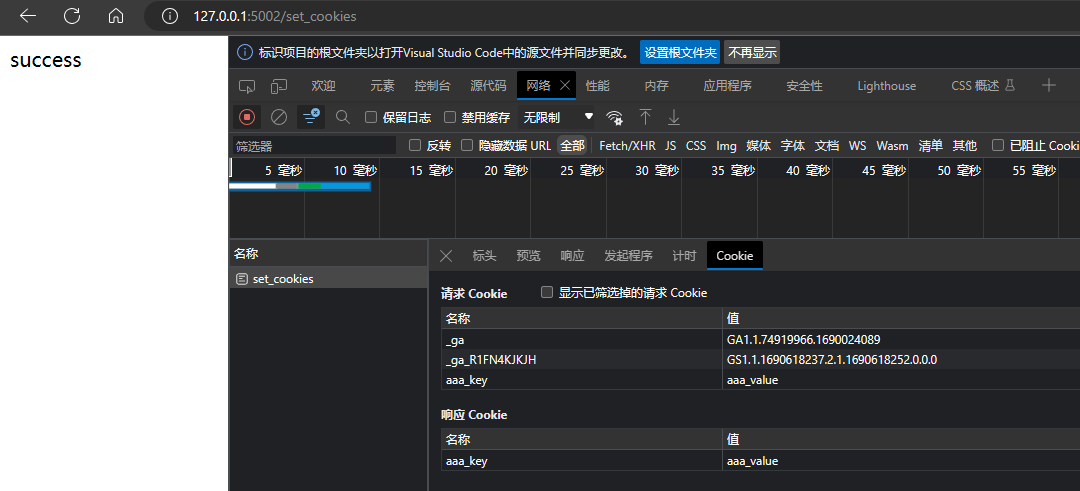
Cookie
Cookie本身由浏览器保存,通过Response将cookie写到浏览器上,下一次访问,浏览器会根据不同的规则,携带cookie
Cookie
flask中的 **make_response **是一个用于创建响应对象的函数,它可以接受不同格式的参数,比如字符串、元组、字典等,并将其转换为flask.Response类的实例。flask.Response类是flask用于表示HTTP响应的默认类,它有一些属性和方法,比如status_code, headers, data, set_cookie等,可以用来设置响应的状态码、头部、数据、cookie等信息
路由:
1
2
3
4
5
6
7
8
9
10
11
12
13
14
15
16
| @app.route('/set_cookies')
def set_cookie():
resp = make_response('success')
resp.set_cookie('aaa_key', 'aaa_value', max_age=3600)
return resp
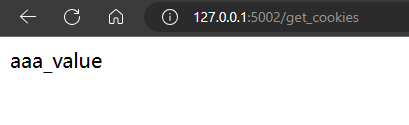
@app.route('/get_cookies')
def get_cookie():
cookie_1 = request.cookies.get('aaa_key')
return cookie_1
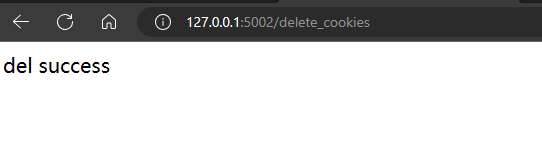
@app.route('/delete_cookies')
def delete_cookie():
resp = make_response('del success')
resp.delete_cookie('aaa_key')
return resp
|
Session
1
2
3
4
| app = Flask(__name__)
app.secret_key = "123456"
|
路由:
1
2
3
4
5
6
7
8
9
10
11
12
13
14
15
16
17
18
19
20
21
22
| @app.route('/')
def index():
if 'username' in session:
user = session['username']
return '登陆用户名 : ' + user + '<br>' + '<b><a href="/logout">点击注销</a></b>'
return '您暂未登录, <br><a href="/login">点击登录</a>'
@app.route('/login', methods=['POST', 'GET'])
def login():
if request.method == 'POST':
session['username'] = request.form['username']
return redirect(url_for('index'))
elif request.method == 'GET':
return render_template('login.html')
@app.route('/logout')
def logout():
session.pop('username', None)
return redirect(url_for('index'))
|
login.html
1
2
3
4
| <form action="/login" method="POST">
<p><input type="text" name="username" id=""></p>
<p><input type="submit" value="登录"></p>
</form>
|
消息闪现flash
flash会将消息放进request里面,让下一个request也可以获得,flash本质是对session的封装
flash和它的名字一样,是闪现,意思就是我们的消息只会显示一次,当我们再次刷新也面的时候,它就不存在了,而正是这点,它经常被用来显示一些提示消息,比如登陆之后,显示欢迎信息等
使用flash
1
| from flask import Flask, flash, redirect, render_template, request, url_for
|
先定义一个app实例和secret_key
1
2
| app = Flask(__name__)
app.secret_key = "123456"
|
1
2
3
4
5
6
7
8
9
10
11
12
13
14
15
16
17
| @app.route('/')
def index():
return render_template('index2.html')
@app.route('/login', methods=['POST', 'GET'])
def login():
errormsg = None
if request.method == 'POST':
if request.form['username'] != 'admin' or request.form['password'] != 'admin':
errormsg = "Invalid username or password. Please try again!"
else:
flash('You were successfully logged in')
return redirect(url_for('index'))
return render_template('login.html', error = errormsg)
|
index2.html
1
2
3
4
5
6
7
8
9
10
11
12
| <body>
{% with messages = get_flashed_messages() %}
{% if messages %}
{% for message in messages %}
<p>{{ message }}</p>
{% endfor %}
{% endif %}
{% endwith %}
<h3>Welcome</h3>
<a href="{{url_for('login')}}">login</a>
</body>
</html>
|
login.html
1
2
3
4
5
6
7
8
9
10
11
12
13
14
15
16
17
18
| <form action="/login" method="POST">
<table>
<tr>
<th>username</th>
<td><input type="text" name="username" ></td>
</tr>
<tr>
<th>password</th>
<td><input type="password" name="password"></td>
</tr>
<tr>
<td><input type="submit" value="submit" ></td>
</tr>
</table>
</form>
{% if error %}
<p><strong>Error:</strong>{{ error }}</p>
{% endif %}
|
文件上传
可以使用 request.files[‘filename’] 拿到form表单上传的文件
代码示例:
1
2
3
4
5
6
7
8
9
10
11
12
13
14
15
16
17
18
19
20
21
22
23
24
25
26
27
28
| from flask import Flask, render_template, request
from werkzeug.utils import secure_filename
''' secure_filename
可以自动将 My movie.mov 转化成 My_movie.mov
将文件名带“/”的 如 etc/passwd 转化为etc_passwd
就是为了文件名不发生异常
'''
import os
app = Flask(__name__)
app.config['UPLOAD_FOLDER'] = 'uploaddir/'
@app.route('/')
def upload_file():
return render_template('upload10.html')
@app.route('/uploader', methods=['POST', 'GET'])
def uploader():
if request.method == 'POST':
f = request.files['file111']
f.save(os.path.join(app.config['UPLOAD_FOLDER'], secure_filename(f.filename)))
return 'file upload successfully'
elif request.method == 'GET':
return render_template('upload10.html')
if __name__ == "__main__":
app.run(debug=True)
|
upload10.html
1
2
3
4
5
6
| <body>
<form action="/uploader" method="POST" enctype="multipart/form-data">
<input type="file" name="file111">
<input type="submit" value="提交">
</form>
</body>
|
WTF表单
这是Flask自己的表单控件,就可以不使用HTML的表单控件了
需要使用 wtform 包
wtform 使用邮件验证器,需要安装email_validator
pip install email_validator
示例:
app.py
1
2
3
4
5
6
7
8
9
10
11
12
13
14
15
16
17
18
19
20
21
| from flask import Flask, render_template, request, flash
from form11 import ContactForm
app = Flask(__name__)
app.secret_key = "123456"
@app.route('/', methods = ['POST', 'GET'])
def contact():
form1 = ContactForm()
if request.method == 'POST':
if form1.validate() == False:
flash("All fields are required.")
return render_template('contact11.html', form = form1)
else:
return render_template('success11.html')
elif request.method == 'GET':
return render_template('contact11.html', form = form1)
if __name__ == "__main__":
app.run(debug=True)
|
contact11.html
1
2
3
4
5
6
7
8
9
10
11
12
13
14
15
16
17
18
19
20
21
22
23
24
25
26
27
28
29
30
31
32
33
34
35
36
37
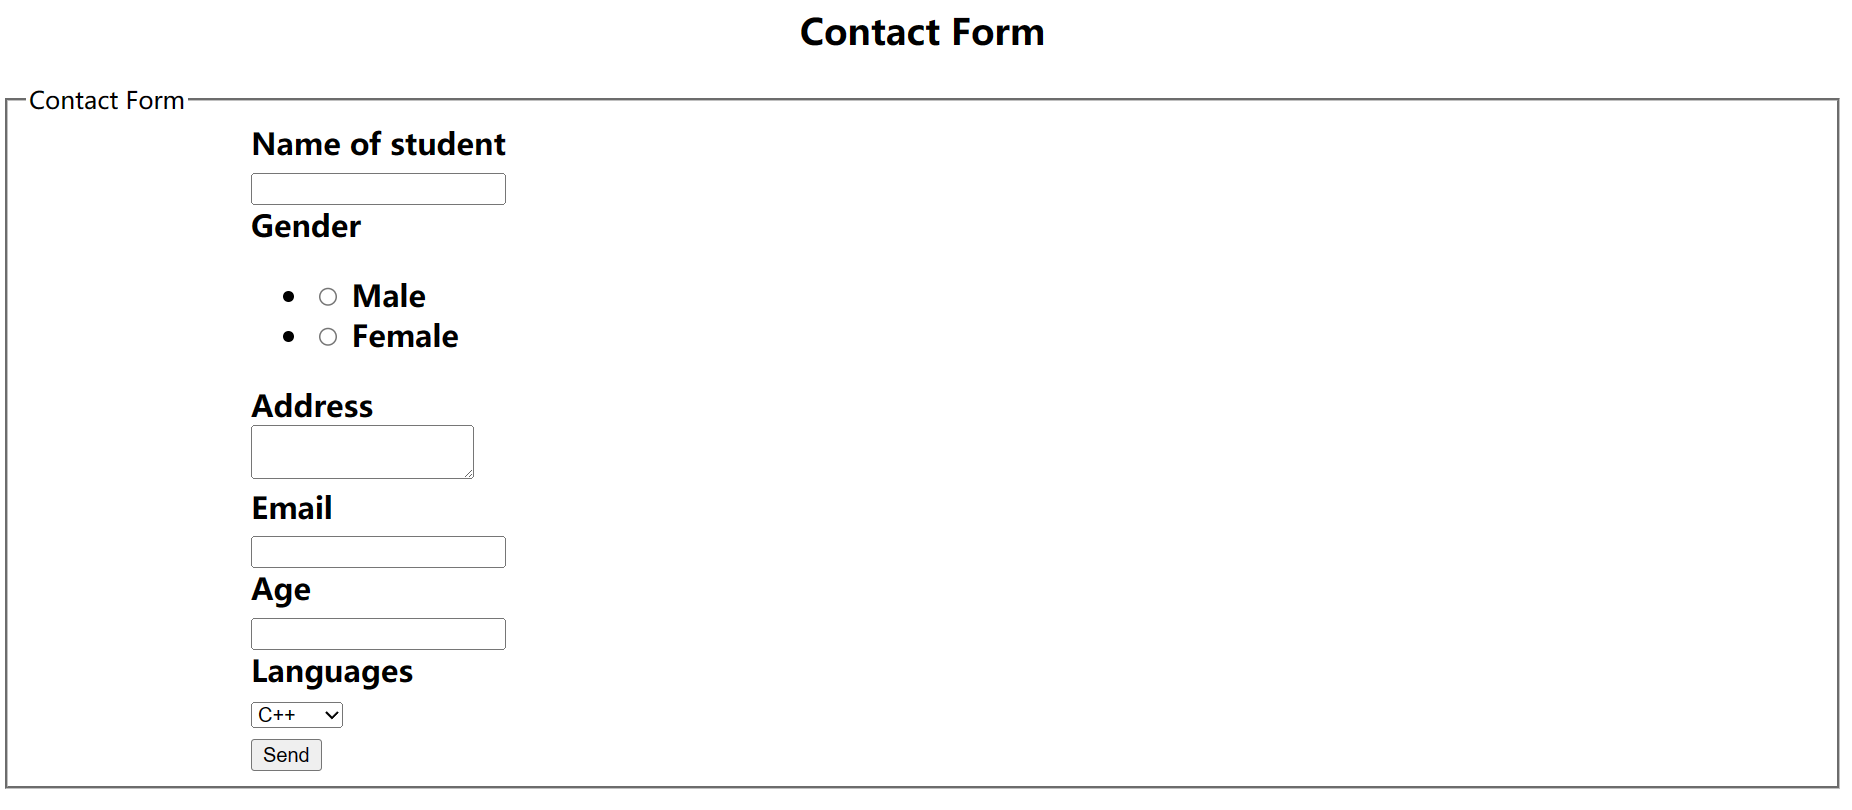
| <body>
<h2 style="text-align: center;">Contact Form</h2>
{% for message in form.name.errors %}
<div>{{ message }}</div>
{% endfor %}
{% for message in form.email.errors %}
<div>{{ message }}</div>
{% endfor %}
<form action="/" method="POST">
<fieldset>
<legend>Contact Form</legend>
{{ form.hidden_tag() }}
<div style="font-size: 20px; font-weight: bold; margin-left: 150px;">
{{ form.name.label }}<br>
{{ form.name }} <br>
{{ form.Gender.label }} {{ form.Gender }}
{{ form.Address.label }} <br>
{{ form.Address }} <br>
{{ form.email.label}} <br>
{{ form.email}} <br>
{{ form.Age.label}} <br>
{{ form.Age }} <br>
{{ form.language.label }} <br>
{{ form.language }} <br>
{{ form.submit }}
</div>
</fieldset>
</form>
</body>
|
success11.html
1
2
3
| <body>
Form posted successfully
</body>
|
连接Mysql
flask要连接mysql,需要先安装python操作MySQL的驱动
(1) MySQL-python :的也就是MySQLdb。是对C语言操作MySQL数据库的一个简单封装。遵循了Python DB API v2。但是只支特Python2。
(2) mysqlclient :是MySQL-python的另外一个分支。支持Python3并且修复了一些bug。是目前为止执行效率最高的驱动,但是安装的时候容易因为环境问题出错。
(3) pymysql :纯Python实现的一个驱动。因为是纯Python编写的,因此执行效率不如mysqlclient。也正因为是纯Python写的,因此可以和Python代码无缝衔接。
(4) mysql-connector–python :MySQL官方推出的纯Python连接MySQL的驱动,执行效率pymysql还慢。
下面学习使用的是 pymysql
Flask-SQLAlchemy
在Flask中,我们很少会使用pymysql直接写原生SQL语句去操作数据库,更多的是通过SQLAlchemy提供的ORM技术,类似于操作普通Python对象一样实现数据库的增删改查操作,而Flask-SQLAlchemy是对SQLAlchemy的一个封装,使得在Flask中使用SQLAlchemy更加方便。Flask-SQLAlchemy是需要单独安装,因为Flask-SQLAlchemy依赖SQLAlchemy,所以只要安装了Flask-SQLAlchemy,SQLAlchemy会自动安装。安装命令如下。
1
| pip install flask-sqlalchemy
|
注意:SQLAlchemy类似于Jinja2,是可以独立于Flask而被使用的
连接数据库
1
2
3
4
5
6
7
8
9
10
11
12
13
14
15
16
17
18
19
20
21
22
23
24
25
26
27
28
29
30
31
32
33
34
35
36
37
| from flask import Flask
from flask_sqlalchemy import SQLAlchemy
from sqlalchemy import text
app = Flask(__name__)
HOSTNAME="127.0.0.1"
PORT=3306
USERNAME="root"
PASSWORD="638436"
DATABASE="ts"
app.config['SQLALCHEMY_DATABASE_URI'] = f"mysql+pymysql://{USERNAME}:{PASSWORD}@{HOSTNAME}:{PORT}/{DATABASE}?charset=utf8"
db = SQLAlchemy(app)
with db.engine.connect() as conn:
rs = conn.execute(text("select 1"))
print(rs.fetchone())
@app.route('/')
def hello_world():
return 'Hello World!'
if __name__ == '__main__':
app.run()
|
上述代码会报错!
RuntimeError: Working outside of application context.
这是应用上下文问题
解决如下
1
2
3
4
5
6
|
with app.app_context():
with db.engine.connect() as conn:
rs = conn.execute("select 1")
print(rs.fetchone())
|
ORM模型
连接号数据库,如何创建表,需要用到ORM(Object Relationship Mapping)对象关系映射
简单来说就是 类 映射到 表
对象关系映射(Object Relationship Mapping),简称ORM,是一种可以用Python面向对象的方式来操作关系型数据库的技术,具有可以映射到数据库表能力的Python类我们称之为ORM模型。一个ORM模型与数据库中一个表相对应,ORM模型中的每个类属性分别对应表的每个字段,ORM模型的每个实例对象对应表中每条记录。ORM技术提供了面向对象与SQL交互的桥梁,让开发者用面向对象的方式操作数据库,使用ORM模型具有以下优势。
(1) 开发效率高:几乎不需要写原生SQL语句,使用纯Pythor的方式操作数据库,大大的提高了开发效率。
(2) 安全性高:ORM模型底层代码对一些常见的安全问题,比如SQL注入做了防护,比直接使用SQL语句更加安全。
(3) 灵活性强:Flask-SQLAlchemy底层支持SQLite、MySQL、Oracle、PostgreSQL等关系型数据库,但针对不同的数据库,ORM模型代码几乎一模一样,只需修改少量代码,即可完成底层数据库的更换。
1
2
3
4
5
6
7
8
9
10
11
12
13
14
15
16
17
18
19
20
21
22
23
24
25
26
27
28
29
30
31
32
33
34
35
36
37
38
39
40
41
42
43
44
45
46
47
48
49
50
| from flask import Flask
from flask_sqlalchemy import SQLAlchemy
app = Flask(__name__)
H0STNAME="127.0.0.1"
P0RT=3306
USERNAME="root"
PASSWORD="638436"
DATABASE="ts"
app.config['SQLALCHEMY_DATABASE_URI'] = f"mysql+pymysql://{USERNAME}:{PASSWORD}@{H0STNAME}:{P0RT}/{DATABASE}?charset=utf8"
db = SQLAlchemy(app)
class User(db.Model):
__tablename__ = "user"
id = db.Column(db.Integer, primary_key=True, autoincrement=True)
username = db.Column(db.String(100), nullable=False)
passwd = db.Column(db.String(100), nullable=False)
'''
user = User(name="KennyCaty",passwd="11111")
之后就可以通过创建对象的方法创建表中的数据
'''
'''
db.create_all() 直接写会报错,还是需要处理应用上下文问题
'''
with app.app_context():
db.create_all()
@app.route('/')
def hello_world():
return 'Hello World!'
if __name__ == '__main__':
app.run()
|
CUDR
查
1
2
3
4
5
6
7
8
9
10
11
| @app.route('/user/query')
def query_user():
user = User.query.get(1)
print(f"{user.id}: {user.username} - {user.passwd}")
users = User.query.filter_by(username="周杰伦")
user2 = users[0]
print(f"{user2.id}: {user2.username} - {user2.passwd}")
return "query_success"
|
增
1
2
3
4
5
6
7
8
9
| @app.route('/user/add')
def add_user():
user = User(username="周杰伦", passwd="1234")
db.session.add(user)
db.session.commit()
return "add_success"
|
删
1
2
3
4
5
6
7
8
| @app.route('/user/delete')
def delete_user():
user = User.query.filter_by(id=2).first()
if user!=None:
db.session.delete(user)
db.session.commit()
return "delete_success"
|
改
1
2
3
4
5
6
7
8
9
| @app.route('/user/update')
def update_user():
user = User.query.filter_by(id=1).first()
if user!=None:
user.passwd = "2222"
print(f"{user.id}: {user.username} - {user.passwd}")
db.session.commit()
return "update_success"
|
外键
1
2
3
4
5
6
7
8
9
10
11
| class Article(db.Model):
__tablename__ = "article"
id = db.Column(db.Integer, primary_key=True, autoincrement=True)
title = db.Column(db.String(200), nullable=False)
content = db.Column(db.Text, nullable=False)
author_id = db.Column(db.Integer, db.ForeignKey("user.id"))
author = db.relationship("User", backref="articles")
|
flask-migrate
有时候在类中更改数据库字段,数据库并不会更改,需要使用flask-migrate, 就不用db.create_all() 了
1
| pip install flask-migrate
|
1
2
3
4
5
| from flask_migrate import Migrate
db = SQLAlchemy(app)
migrate = Migrate(app, db)
|
映射三步骤:(注意,要先运行app.py)
- flask db init 只需要指定一次,就会在目录下多一个migration文件夹
- flask db migrate 识别新增字段,自动添加迁移脚本
- flask db upgrade 运行迁移脚本, 同步到数据库
Sijax
Flask的Ajax
使用:
1
2
| from flask import Flask, g, render_template
import flask_sijax
|